Scourge of the Slave Lords V: The Hidden Stockade
Campaign Narrative
Sir Blanque, Destiny and Marion leave the vicinity of Zoshai immediately after taking out the leadership in the slavers' temple. The Marines of Eshmir can take care of the rest of the place. Bomilcar is tasked with telling Duke Avan Astran, leader of their trade and diplomatic mission, what they are doing, and set off for the location of the secret stockade they found out about in documents they have seized from the slavers. They also tell Bomilcar about the hidden place in the mountains called 'Suderham', the idea being that the three powerful PCs will act as an advance scouting and infiltration party while the Esmirian forces and their friends follow in their trail.
Fortunately, there is very little incident as they head deeper into the countryside of Changshai. Everywhere is in uproar, the lawless state of the country becoming ever more apparent. The characters avoid any potential encounters with the locals with ease, and eventually find themselves looking at a substantial fort on a large promontory:

There is no way the three of them are going into somewhere like this from the front. However, they already know that these guys have a real propensity for back entrances and multiple escape routes, so the group decides to skirt the ridgeline within the trees, keeping the fort in sight at all times. They are hoping to probe its defences and find some sort of weak spot.

As they pick their way gingerly across the wooded hill, they realise that discretion will definitely be preferable to getting killed; this place could easily hold several hundred men. There are certainly plenty of guards silhouetted on the walls as they march up and down between crenellations created by the top of the palisade. And, knowing the slavers as they already do, humans probably won't be the only things they will to contend with in there.
Taking advantage of the nighttime cover, the companions arrive part of the way down the hill at the rear of the fortress. Although the stockade is almost entirely made of wood, it is still a substantial position, and they decide to spend a full day watching over the place. The dawn light shows that they are lying above a lake, and further careful investigation allows them to find a hollow set into the rear of the hill - definitely a possible way into the fortress from below. The adventurous friends wait until well into nightfall to take advantage of Sir Blanque's flash-bang abilities, and make their move.
As they slip into the depression from the trees, they do indeed find a well-camouflaged entrance cave that has a tunnel leading right into the heart of the hill itself. They can tell that after about twenty feet it opens up into a large natural cavern, and they can hear voices in there - maybe around half a dozen guards, although they don't seem to be taking many precautions. Perhaps they aren't expecting anyone hostile from this direction?
Destiny orders an air elemental to sort any noise escaping their attack, and the three characters move inwards. First up is a fire elemental blast, and then the survivors are easily finished off - there are in fact seven of them, archers whose positions are arranged around a campfire bivouac facing into the hill. The party's initial caution has paid off handsomely; as was the case back at the temple outside Zoshai, the slavers have left an escape route for themselves.
Careful listening in the aftermath of the massacre seems to show that no alarm has been raised - the trick with the air elemental has worked and, fortuitously, it turns out that a long natural cavern that runs about 350' into the hillside runs in a natural curve, so nobody further in will have seen the light of the elementals. The characters carefully and silently move along this passage. They can all see in the darkness perfectly well, thanks to Sir Blanque's natural night perceptions, Marion's Shadowdance, and a fire elemental to give Destiny heat vision. About fifteen feet before the passage widens into another large cavern, the players find a doorway to their left. Guessing that it is probably concealed from the other side, they take this one, prompted by a conversation between several people coming from the large cavern. They are speaking in Dharzi, so the characters slip into the doorway instead. No point in a confrontation with the sorcerous Dharzi at this stage, and so far the group is still undiscovered.

They are now in an artificially constructed area carefully faced with dressed stone. A 5' wide passageway leads to a 'Y' junction. At the junction, Sir Blanque finds a lever of some sort set into the wall; he surmises that it is the control mechanism for a trap to be set to cover the escape of one of the leaders. He turns out to be right - it would activate a very long pit trap of some kind located at the tip of the long end of 'Y'.
The party takes the left hand corridor, which ends in a door. They cannot hear anything from inside that, so Destiny carefully and silently picks the lock. They find themselves in, of all things, a bedroom (number 33 on the map). Fortunately, being careful has paid dividends; as Destiny moves the door open just a crack. enough to see through, she realises that someone very large indeed is asleep on a bed. She also spots another door right across the room from this one, with a shield propped up against it, presumably as a precaution against intrusion. Opening that door will cause the shield to clatter and wake the room's occupant. Assuming that the same has been done with this door, she very smoothly opens it enough for Marion to slip in and remove the shield that has indeed been placed there as well. Destiny moves across to get a good look at the person in the bed, and Sir Blanque comes into he room too. The man in the bed is a very large, burly individual. Unnaturally heavily muscled, he has the head of a bull. "Dharzi magic!" hisses Destiny to herself. On a long low table lies a large, two-handed axe. Unfortunately, however, the man sense something moving in the room and start to wake up; Sir Blanque, in a low voice, says "We can't just murder him in his bed;" Marion obliges by shadow dancing right next to him and smacking him right in the middle of the forehead with her dagger, just as he reaches out for his unfeasibly large axe. This does the trick, and the entire bed shudders.
Destiny thinks that something moved on the wall behind the now unconscious bull-man's head and, sure enough, further investigation reveals a concealed passageway. The three friends pull the sleeping giant's bed frame to one side, using it further to block the door opposite to where they came in and, making sure he is still out cold, steal his axe and head into the concealed passageway.
This takes them into room 34, a veritable treasure trove of alchemical materials, some of which Destiny gleefully loots. At first, it appears as though the room has no other exits, but eventually a secret door is found, leading from the far right hand corner into another bedroom (marked 35 on the map). This one, though, has been hastily and, by the look of it, very recently vacated; bedclothes are strewn across the floor. Whoever was in here must have heard the party searching the alchemy room. There doesn't appear to be a way out, though, but careful searching finds a concealed door at the room's top left from the party's perspective, plus an alcove within a concealed exit in the main fireplace. The alcove itself is empty and the passageway that is revealed seems to lead back to the 'Y' junction and the Dharzi voices they heard earlier. Whoever they were may well now have been alerted, so the party heads through the other secret door.
A 5' wide passageway leads 10' to another door. This leads in turn to another bedroom. Here they surprise what looks like a female Dharzi as she sits at a table, writing on some parchment. There is another door, on the wall to the right of where they came into this room (square room marked as 30 on the map). The woman drops to her knees and begs to surrender; speaking in 'pande and Low Melnibonean, she pleads for her life and those of the other victims of Dharzi experimentation. This is entirely unexpected, but she explains that she is in fact a woman taken by the slave lords from a ship that was travelling to Elwher. "That evil devil-woman Markessa has been inflicting sorcerous surgery on me to make me look like her; I am almost her exact double! She has been using magic on my mind to make me think like her - think that I am her! I can't last out much longer..."
"Why would she do that?" asks Sir Blanque. "I don't know," comes the reply, "but she seems to hate someone called Blackthorn with a passion." Destiny muses, "I wonder if this Markessa is trying to organise some sort of deception. She must be Dharzi, and we already know that there seems to be a power struggle developing between the Dharzi and Stalman Klim over the leadership of the Slave Lords. She could be intending to use our friend here as a distraction before she strikes. In a weird way, this is good news. We could take advantage of this faction fighting."
Destiny takes a close look at the terrified woman, noting where her facial features have been surgically altered to make her look like a Dharzi. It is exquisite work, and she detects faint traces of sorcery, presumably used to hide any incisions and smooth residual scarring. "The bitch keeps me drugged and paralysed when she operates on me," continues their new friend, "but it does not dull the pain. She is quite open about trying to shatter my mind. She says she needs me because I have some sorcerous training so that I can seem to be her; fortunately, though, my mental strength has enabled me to keep my mind this long. I can no longer remember my real name, or much else to be honest, but I hope it will all come back to me in time. But where is she? You have all just come from her own chamber."
So that explains the missing person - she must be the one who fled. The lack of pursuit seems rather puzzling, though. Marion suggests that if there is an ongoing power struggle, then maybe this Markessa has done a runner with the other Dharzi whose voices they heard earlier. "Perhaps Markessa has realised that there are infiltrators, and that we will do her dirty work for her?" she asks. Whatever the truth of that, the complex remains quiet, adding force to Marion's observations.
The amnesiac woman leads them through yet another secret door to the bed chamber of her lover (Room 31). "He is supposed to be Markessa's bodyguard," she says, "But we have become secret lovers." His room contains serious training equipment, but apart from that is rather bare. The two of them ask about their friend the bull-man, another of result of Markessa's experiments - "She calls him her 'minotaur', whatever that means," she shudders. Marion explains that she knocked him unconscious and left him behind; "He should be safe and sound, although he will probably wake up with a hell of a headache." The two Dharzi victims thank the group profusely, and promise to watch over this part of the complex for them, protecting the rear of their expedition as they head further into the hill.
Markessa's double knows enough about the leaders of the slave lords in the stockade to fill in some information for the characters. They already know about Markessa; her rival Blackthorn is a real weird-looking bald man. He is seven feet tall, almost skeletally thin, and bald. Everyone else seems to be in fear of him - maybe he is of sorcerous origin? Icar is the name of the fort's commander; a veteran warrior, he is a tactical genius. He is blind due to an old war wound, and has trained himself to fight sightless; he always wears full plate mail. His companion and friend is simply known as 'the Executioner'. His description makes him sound especially brutal, even bestial; the party thinks he may be a particularly dangerous member of Xiombarg's chaos pack; according to their informant, he fights with a greatsword. Guliyet is a witch doctor, hailing from the semi-feral forest tribes that still live in this southeastern corner of Changshai. Their new friend really hates her because she often helps Markessa in her sorceries. The final leader, Azru Nazaryet, is a male shaman from another local tribe. It looks as though the slavers have used the promise of wealth and power to ally themselves with the locals.
Umpire's Notes
The players have continued with their trademark modus operandi: stealth and diplomacy, backed up with serious firepower (quite literally!) and melee capability when needed. Searching for a rear entrance to the slavers' stockade paid real dividends, as did their decision to avoid the Dharzi. The information gleaned from the false Markessa will come in really useful, and they now have allies inside the fortress. The players didn't know this for sure at the time, but Beth's suggestion (Marion's player) about Markessa fleeing with the other Dharzi was absolutely correct. I'm riffing off the suggestions of a secret war within the slave lords' council, but I am not entirely following the module - to be honest, I never do. There, Stalman Klim is planting false information to lead the players to Suderham, so that he can capture them and use they presence and various forged documents to destroy the Dharzi member of the inner council, a women by the name of Edralve. That doesn't quite work for my version, because I have other plans for Lolth's Dharzi servants. More will be revealed in time...
Sir Blanque, Destiny and Marion leave the vicinity of Zoshai immediately after taking out the leadership in the slavers' temple. The Marines of Eshmir can take care of the rest of the place. Bomilcar is tasked with telling Duke Avan Astran, leader of their trade and diplomatic mission, what they are doing, and set off for the location of the secret stockade they found out about in documents they have seized from the slavers. They also tell Bomilcar about the hidden place in the mountains called 'Suderham', the idea being that the three powerful PCs will act as an advance scouting and infiltration party while the Esmirian forces and their friends follow in their trail.
Fortunately, there is very little incident as they head deeper into the countryside of Changshai. Everywhere is in uproar, the lawless state of the country becoming ever more apparent. The characters avoid any potential encounters with the locals with ease, and eventually find themselves looking at a substantial fort on a large promontory:

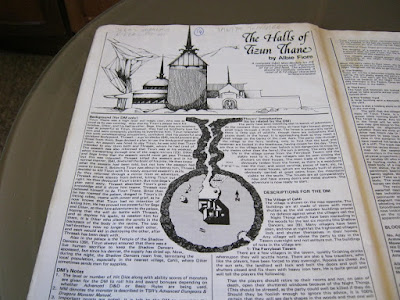
Adventurers being sneaky - photo take from the module. The names you can see just at the top left of the photo are the major NPCs in the fortress; their starting locations are randomised.
There is no way the three of them are going into somewhere like this from the front. However, they already know that these guys have a real propensity for back entrances and multiple escape routes, so the group decides to skirt the ridgeline within the trees, keeping the fort in sight at all times. They are hoping to probe its defences and find some sort of weak spot.

The module map of the stockade. It's large: something like 350' long by 200' wide, and consisting of multiple storeys.
As they pick their way gingerly across the wooded hill, they realise that discretion will definitely be preferable to getting killed; this place could easily hold several hundred men. There are certainly plenty of guards silhouetted on the walls as they march up and down between crenellations created by the top of the palisade. And, knowing the slavers as they already do, humans probably won't be the only things they will to contend with in there.
Taking advantage of the nighttime cover, the companions arrive part of the way down the hill at the rear of the fortress. Although the stockade is almost entirely made of wood, it is still a substantial position, and they decide to spend a full day watching over the place. The dawn light shows that they are lying above a lake, and further careful investigation allows them to find a hollow set into the rear of the hill - definitely a possible way into the fortress from below. The adventurous friends wait until well into nightfall to take advantage of Sir Blanque's flash-bang abilities, and make their move.
As they slip into the depression from the trees, they do indeed find a well-camouflaged entrance cave that has a tunnel leading right into the heart of the hill itself. They can tell that after about twenty feet it opens up into a large natural cavern, and they can hear voices in there - maybe around half a dozen guards, although they don't seem to be taking many precautions. Perhaps they aren't expecting anyone hostile from this direction?
Destiny orders an air elemental to sort any noise escaping their attack, and the three characters move inwards. First up is a fire elemental blast, and then the survivors are easily finished off - there are in fact seven of them, archers whose positions are arranged around a campfire bivouac facing into the hill. The party's initial caution has paid off handsomely; as was the case back at the temple outside Zoshai, the slavers have left an escape route for themselves.
Careful listening in the aftermath of the massacre seems to show that no alarm has been raised - the trick with the air elemental has worked and, fortuitously, it turns out that a long natural cavern that runs about 350' into the hillside runs in a natural curve, so nobody further in will have seen the light of the elementals. The characters carefully and silently move along this passage. They can all see in the darkness perfectly well, thanks to Sir Blanque's natural night perceptions, Marion's Shadowdance, and a fire elemental to give Destiny heat vision. About fifteen feet before the passage widens into another large cavern, the players find a doorway to their left. Guessing that it is probably concealed from the other side, they take this one, prompted by a conversation between several people coming from the large cavern. They are speaking in Dharzi, so the characters slip into the doorway instead. No point in a confrontation with the sorcerous Dharzi at this stage, and so far the group is still undiscovered.

The players don't know it for sure yet, but the area under the fortress is huge. They have entered from the bottom left of the photo, and are currently slipping through the secret exit just before the cavern numbered 38 on the map.
They are now in an artificially constructed area carefully faced with dressed stone. A 5' wide passageway leads to a 'Y' junction. At the junction, Sir Blanque finds a lever of some sort set into the wall; he surmises that it is the control mechanism for a trap to be set to cover the escape of one of the leaders. He turns out to be right - it would activate a very long pit trap of some kind located at the tip of the long end of 'Y'.
The party takes the left hand corridor, which ends in a door. They cannot hear anything from inside that, so Destiny carefully and silently picks the lock. They find themselves in, of all things, a bedroom (number 33 on the map). Fortunately, being careful has paid dividends; as Destiny moves the door open just a crack. enough to see through, she realises that someone very large indeed is asleep on a bed. She also spots another door right across the room from this one, with a shield propped up against it, presumably as a precaution against intrusion. Opening that door will cause the shield to clatter and wake the room's occupant. Assuming that the same has been done with this door, she very smoothly opens it enough for Marion to slip in and remove the shield that has indeed been placed there as well. Destiny moves across to get a good look at the person in the bed, and Sir Blanque comes into he room too. The man in the bed is a very large, burly individual. Unnaturally heavily muscled, he has the head of a bull. "Dharzi magic!" hisses Destiny to herself. On a long low table lies a large, two-handed axe. Unfortunately, however, the man sense something moving in the room and start to wake up; Sir Blanque, in a low voice, says "We can't just murder him in his bed;" Marion obliges by shadow dancing right next to him and smacking him right in the middle of the forehead with her dagger, just as he reaches out for his unfeasibly large axe. This does the trick, and the entire bed shudders.
Destiny thinks that something moved on the wall behind the now unconscious bull-man's head and, sure enough, further investigation reveals a concealed passageway. The three friends pull the sleeping giant's bed frame to one side, using it further to block the door opposite to where they came in and, making sure he is still out cold, steal his axe and head into the concealed passageway.
This takes them into room 34, a veritable treasure trove of alchemical materials, some of which Destiny gleefully loots. At first, it appears as though the room has no other exits, but eventually a secret door is found, leading from the far right hand corner into another bedroom (marked 35 on the map). This one, though, has been hastily and, by the look of it, very recently vacated; bedclothes are strewn across the floor. Whoever was in here must have heard the party searching the alchemy room. There doesn't appear to be a way out, though, but careful searching finds a concealed door at the room's top left from the party's perspective, plus an alcove within a concealed exit in the main fireplace. The alcove itself is empty and the passageway that is revealed seems to lead back to the 'Y' junction and the Dharzi voices they heard earlier. Whoever they were may well now have been alerted, so the party heads through the other secret door.
A 5' wide passageway leads 10' to another door. This leads in turn to another bedroom. Here they surprise what looks like a female Dharzi as she sits at a table, writing on some parchment. There is another door, on the wall to the right of where they came into this room (square room marked as 30 on the map). The woman drops to her knees and begs to surrender; speaking in 'pande and Low Melnibonean, she pleads for her life and those of the other victims of Dharzi experimentation. This is entirely unexpected, but she explains that she is in fact a woman taken by the slave lords from a ship that was travelling to Elwher. "That evil devil-woman Markessa has been inflicting sorcerous surgery on me to make me look like her; I am almost her exact double! She has been using magic on my mind to make me think like her - think that I am her! I can't last out much longer..."
"Why would she do that?" asks Sir Blanque. "I don't know," comes the reply, "but she seems to hate someone called Blackthorn with a passion." Destiny muses, "I wonder if this Markessa is trying to organise some sort of deception. She must be Dharzi, and we already know that there seems to be a power struggle developing between the Dharzi and Stalman Klim over the leadership of the Slave Lords. She could be intending to use our friend here as a distraction before she strikes. In a weird way, this is good news. We could take advantage of this faction fighting."
Destiny takes a close look at the terrified woman, noting where her facial features have been surgically altered to make her look like a Dharzi. It is exquisite work, and she detects faint traces of sorcery, presumably used to hide any incisions and smooth residual scarring. "The bitch keeps me drugged and paralysed when she operates on me," continues their new friend, "but it does not dull the pain. She is quite open about trying to shatter my mind. She says she needs me because I have some sorcerous training so that I can seem to be her; fortunately, though, my mental strength has enabled me to keep my mind this long. I can no longer remember my real name, or much else to be honest, but I hope it will all come back to me in time. But where is she? You have all just come from her own chamber."
So that explains the missing person - she must be the one who fled. The lack of pursuit seems rather puzzling, though. Marion suggests that if there is an ongoing power struggle, then maybe this Markessa has done a runner with the other Dharzi whose voices they heard earlier. "Perhaps Markessa has realised that there are infiltrators, and that we will do her dirty work for her?" she asks. Whatever the truth of that, the complex remains quiet, adding force to Marion's observations.
The amnesiac woman leads them through yet another secret door to the bed chamber of her lover (Room 31). "He is supposed to be Markessa's bodyguard," she says, "But we have become secret lovers." His room contains serious training equipment, but apart from that is rather bare. The two of them ask about their friend the bull-man, another of result of Markessa's experiments - "She calls him her 'minotaur', whatever that means," she shudders. Marion explains that she knocked him unconscious and left him behind; "He should be safe and sound, although he will probably wake up with a hell of a headache." The two Dharzi victims thank the group profusely, and promise to watch over this part of the complex for them, protecting the rear of their expedition as they head further into the hill.
Markessa's double knows enough about the leaders of the slave lords in the stockade to fill in some information for the characters. They already know about Markessa; her rival Blackthorn is a real weird-looking bald man. He is seven feet tall, almost skeletally thin, and bald. Everyone else seems to be in fear of him - maybe he is of sorcerous origin? Icar is the name of the fort's commander; a veteran warrior, he is a tactical genius. He is blind due to an old war wound, and has trained himself to fight sightless; he always wears full plate mail. His companion and friend is simply known as 'the Executioner'. His description makes him sound especially brutal, even bestial; the party thinks he may be a particularly dangerous member of Xiombarg's chaos pack; according to their informant, he fights with a greatsword. Guliyet is a witch doctor, hailing from the semi-feral forest tribes that still live in this southeastern corner of Changshai. Their new friend really hates her because she often helps Markessa in her sorceries. The final leader, Azru Nazaryet, is a male shaman from another local tribe. It looks as though the slavers have used the promise of wealth and power to ally themselves with the locals.
Umpire's Notes
The players have continued with their trademark modus operandi: stealth and diplomacy, backed up with serious firepower (quite literally!) and melee capability when needed. Searching for a rear entrance to the slavers' stockade paid real dividends, as did their decision to avoid the Dharzi. The information gleaned from the false Markessa will come in really useful, and they now have allies inside the fortress. The players didn't know this for sure at the time, but Beth's suggestion (Marion's player) about Markessa fleeing with the other Dharzi was absolutely correct. I'm riffing off the suggestions of a secret war within the slave lords' council, but I am not entirely following the module - to be honest, I never do. There, Stalman Klim is planting false information to lead the players to Suderham, so that he can capture them and use they presence and various forged documents to destroy the Dharzi member of the inner council, a women by the name of Edralve. That doesn't quite work for my version, because I have other plans for Lolth's Dharzi servants. More will be revealed in time...

Comments
Post a Comment