Scourge of the Slave Lords VI: Beneath the Stockade
Campaign Narrative
Now that they have some allies to guard their rear, the adventurous three make their way carefully deeper into the basement level beneath the slavers' stockade. They emerge from the area of the complex belonging to the Dharzi Markessa into a long corridor. To their right, it leads in the direction of the concealed entrance by which they sneaked into the complex, and to the left there is clearly a complicated series of rooms, all artificially constructed and properly faced with dressed stone. They decide to go further to their left, mainly because the way to their right seems to become rough-hewn rather than artificial, and also because they can hear the barking of some unusually large wolfhounds of some sort.

However, before proceeding, the characters decide to make sure they leave no threats behind them, so they enter at the locked door that leads into room 29. Unknown to them, these are the quarters of Guliyet, the shaman who is in league with the now long departed Markessa. Guliyet is not present, but some of her equipment and valuables are, and are swiftly added to the growing pile of loot.
Moving methodically, the three friends move into the adjoining room marked 24 on the map. This one has another door to their left, and turns out to be a kitchen. It is of course empty at this hour of the night. They then go into room 23, a large mess hall, which again is empty.
Their luck runs out, however, when they emerge from the mess hall into a large atrium with doors leading in several directions. A group of soldiers is just arriving from off to the right of the group, obviously just returning from the first evening/night shift on guard duty upstairs in the main part of the stockade. Their sergeant is trying to keep some sort of order, and blearily challenges the three heroes. Fortunately for them, however, they manage to speak enough 'pande to bluff their way past the patrol. Sir Blanque does the talking; "Well met, fine fellows! We have just arrived after an arduous journey, and are looking to inspect some of your fine wares. Would you be able to point us in the direction of your slave pens?" The sergeant tells them to go to the doors just around the corner to their left (both marked 28 on the map), explaining that there is a large cell area in there. The tired troops then trudge off through the central door in this part of the complex (marked 26 on the map); Marion catches a glimpse of what looks like a barracks area before the door closes.
After some discussion, the infiltrators decide that if they can free a decent number of slaves, they may well be able to form a decent combat group to give the slavers some serious trouble in the tunnels beneath their own citadel. This makes the cell block their next main target, and they decide to try to gain an initial advantage by repeating the trick of pretending to be slavers themselves. Approaching the southernmost of the two doors leading into the cells, Destiny picks the lock and all three enter as though the place belongs to them. Each of the areas with a letter here contains a group of slaves of various kinds, except for the cell marked 't' on the map, which contains a rather well-muscled, lithe individual who has been bound - perhaps a dangerous fighter of some kind? The cells marked a, b and c are much larger than the others; cell 'c' contains a crude statue of some sort of goddess, but is otherwise empty.
The area marked 'v' on the map above is a raised platform, reached by two sets of stairs. A group of guards is getting drunk from a large cask of wine. There are some tables and chairs, along with rows of keys to the various cells hanging on the wall behind the troops. There are seven of these in total: five squaddies and a couple of sergeants. They don't even notice the new arrivals at first, and then react in a confused manner; it is taking a while for the presence of these supposed traders in a locked facility to register in their bleary minds as a problem. Destiny fire blasts the wine barrel, which pretty much explodes under the pressure, killing one guard immediately and knocking out several others; the remainder are easily despatched. The players free the bound man first, and he helps them to keep the rest of the slaves calm and relatively quiet; he tells the PCs that he is a monk of Lawful affiliation, and offers to lead the freed slaves to safety in groups to the south of the complex. He and the adventurers then take the slaves out in small groups through to the safe areas that belonged to Markessa, joining up with the folks they freed earlier. The fortress still has not been alerted to their presence, because the two doors leading into the cells are very substantially reinforced pieces of prison equipment, so the sounds of death at the end of the cell complex have not travelled enough to alert anyone. Even so, there is a tense moment as another patrol emerges from the area of the barracks, but again the players manage to bluff them; this time they pretend that they are delivering slaves for processing. These soldiers have just got out of bed and are on their way to the mess hall for breakfast before getting ready to take up the dawn watch on the walls.
Once this is all done, the band of three investigates the large cell with the statue in it. According to the woman they freed earlier, Markessa's sorcerously altered double, there is some sort of cave warren beyond there. She says that this cell is where the insane, mutated remnants of her experiments are dumped, and that it is very likely not safe to go any further. The characters do spot a misshapen thing, possibly a former human, lurking in a crevice concealed in the wall behind the statue, but it skitters off into the darkness beyond. They decide not to follow it.
The trio of friends then resume their methodical progress. Room 27 is a set of latrines, and they decide to avoid the barracks. However, the central corridor leading into another part of the complex turns out to have active inhabitants (marked 25 on the map). Two guards are surprised and swiftly executed, with Destiny's air elemental buffering the sounds. The characters now find themselves in a corridor with three doors on either side - possibly a set of officers' quarters?
They start with the room that is first to their left (25a on the map). Here they surprise a man sitting at a desk, working on a set of plans by lamplight. He jumps up, trying to hide whatever he was doing, and then starts at the appearance of the PCs - "You're not slavers!" He makes no threatening moves, and indeed offers to help them. "My name is Carlstar, and I was captured some months ago by these slavers. However, I have been allowed relative freedom because of my engineering and mining skills - the slavers always make good use of those of us with skills." He has been secretly making his own map of a possible way out towards the south of the slavers' citadel, and the characters confirm his suspicions, since that is how they entered the place in the first instance. Carlstar fills them in on the other inhabitants of this little part of the basement level. Room 'b' contains an alchemist, another former slave who has been forced to work with the slavers, in his case the strange looking elf woman; he too could be persuaded to join in against their overlords. Room 'c' quarters two guard captains - "You'll probably need to take them out quickly, if you can." [This one is incorrectly labelled 'b' just next door to Carlstar's room.] Room 'd' houses the slavers' accountant and scribe - a little weasel of a man who simply cannot be trusted; he actually works for the slavers, and they pay him handsomely too. Room 'e' houses three warriors who have been altered into some sort of berserk lycanthropes by Markessa's magic; Carlstar reckons they will be delighted to turn the tables on their masters. The room marked 'f', however, will be very dangerous; these are the quarters of that weird guy Blackthorn - another of the slave lords about whom the characters have been warned.
First order of business is to get the alchemist on their side, which Carlstar does by the simple expedient of knocking on the guy's door and dragging him out of bed. "Hush!" he says, "This is important. I've come across something you should know in my calculations." He brings the alchemist into his own quarters, and the players greet him. He introduces himself as Fyndax, and says that since he was forced by Markessa to help make the brew that turned the three warriors (in room 'e') into werewolf things, he can make an antidote for them quite quickly - in fact he has the reagents in his room; he just needs a few minutes to mix them. While he does that, the characters knock out the accountant, grabbing his notes and papers for later perusal. The group then makes friends with the altered warriors, and Fyndax gives them the antidote. [One of them made a critical save, and retains the speed, strength and constitution of a werewolf even though he is returned to what looks like normal form.] While in their quarters, Marion notices a well-concealed secret door of which the three men were themselves unaware. The plans now for those three to take out the guard captains, a task they look forward to with relish, while the players follow the secret passageway, which turns in the direction of Blackthorn's quarters. Hopefully this will clean out this entire area of the fortress' basement.
As they move warily and silently through the narrow passage, the group spots a really small square niche in the wall directly ahead of them, just as the corridor turns directly towards Blackthorn's room. They can just about make out a borehole of some sort that leads to a hidden, but rather inaccessible chamber carved into he rock. They note this for later exploration, and then get ready to ambush the slave lord Blackthorn from his own secret passage.
He turns out to be wide awake, and working at his desk. He turns invisible and then levitates up to the ceiling above his desk, a trick that would work on a normal group, but not this lot with their witch sight and so on. Marion puts a couple of throwing knives into him, so he turns into a stream of smoke that heads off into the corridor from which the players have just emerged. Sir Blanque reacts swiftly and grabs an empty waterskin from his belt. Unstoppering it in a single fluid motion, he uses it to gather the smoke [DEX 22 is really useful!]. the skin bulges and shatters as Blackthorn coalesces, and then Destiny's slices open the creature's leg. Blackthorn surrenders, realising he is outmatched. Destiny reckons he is some sort of creature from another plane; those are some rather unusual abilities.
Their opponent grins at them when he hears this. "That's right!" he says, bowing politely, albeit with a mischievous glint in his eye. "On my home world, I am known as a Dai-Oni - a goblin spirit lord, if you will. Stalman Klim summoned me to this place to act as his lieutenant here, and also to keep an eye on that woman Markessa - she is something called a Dharzi, or whatever. Anyway, although my kind can be bound to service, I am here as part of a bargain, and technically you have broken that because I have so helpfully surrendered. I specialise in betrayal, and I would be delighted to help you destroy this ring of slave lords. In order to seal our compact, I will even tell your rather powerful sorceress here my true name; you will then be able to summon me if you so wish. I would rather this than death at your hands."
Umpire's Notes
The players proceeded with their usual skill and caution, and this paid off very handsomely indeed. The reference to the Dai-Oni pleased Beth in particular - she's a big Anime fan. In the original module, he is an ogre mage. The upshot of his deal with the players will be very important, but more on that another time.
Now that they have some allies to guard their rear, the adventurous three make their way carefully deeper into the basement level beneath the slavers' stockade. They emerge from the area of the complex belonging to the Dharzi Markessa into a long corridor. To their right, it leads in the direction of the concealed entrance by which they sneaked into the complex, and to the left there is clearly a complicated series of rooms, all artificially constructed and properly faced with dressed stone. They decide to go further to their left, mainly because the way to their right seems to become rough-hewn rather than artificial, and also because they can hear the barking of some unusually large wolfhounds of some sort.

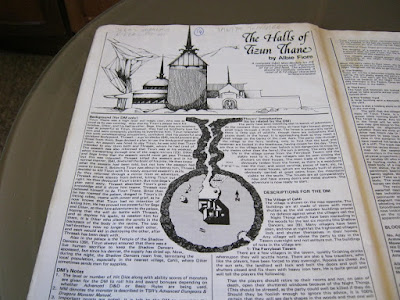
A zoomed-in map of the location of the little band. They are now at the corridor point marked as 30 on the map. The barking noises are coming from area 19; the corridor outside there becomes more of a tunnel as it heads off the bottom edge of the map towards the secret way out of the complex.
However, before proceeding, the characters decide to make sure they leave no threats behind them, so they enter at the locked door that leads into room 29. Unknown to them, these are the quarters of Guliyet, the shaman who is in league with the now long departed Markessa. Guliyet is not present, but some of her equipment and valuables are, and are swiftly added to the growing pile of loot.
Moving methodically, the three friends move into the adjoining room marked 24 on the map. This one has another door to their left, and turns out to be a kitchen. It is of course empty at this hour of the night. They then go into room 23, a large mess hall, which again is empty.
Their luck runs out, however, when they emerge from the mess hall into a large atrium with doors leading in several directions. A group of soldiers is just arriving from off to the right of the group, obviously just returning from the first evening/night shift on guard duty upstairs in the main part of the stockade. Their sergeant is trying to keep some sort of order, and blearily challenges the three heroes. Fortunately for them, however, they manage to speak enough 'pande to bluff their way past the patrol. Sir Blanque does the talking; "Well met, fine fellows! We have just arrived after an arduous journey, and are looking to inspect some of your fine wares. Would you be able to point us in the direction of your slave pens?" The sergeant tells them to go to the doors just around the corner to their left (both marked 28 on the map), explaining that there is a large cell area in there. The tired troops then trudge off through the central door in this part of the complex (marked 26 on the map); Marion catches a glimpse of what looks like a barracks area before the door closes.
After some discussion, the infiltrators decide that if they can free a decent number of slaves, they may well be able to form a decent combat group to give the slavers some serious trouble in the tunnels beneath their own citadel. This makes the cell block their next main target, and they decide to try to gain an initial advantage by repeating the trick of pretending to be slavers themselves. Approaching the southernmost of the two doors leading into the cells, Destiny picks the lock and all three enter as though the place belongs to them. Each of the areas with a letter here contains a group of slaves of various kinds, except for the cell marked 't' on the map, which contains a rather well-muscled, lithe individual who has been bound - perhaps a dangerous fighter of some kind? The cells marked a, b and c are much larger than the others; cell 'c' contains a crude statue of some sort of goddess, but is otherwise empty.
The area marked 'v' on the map above is a raised platform, reached by two sets of stairs. A group of guards is getting drunk from a large cask of wine. There are some tables and chairs, along with rows of keys to the various cells hanging on the wall behind the troops. There are seven of these in total: five squaddies and a couple of sergeants. They don't even notice the new arrivals at first, and then react in a confused manner; it is taking a while for the presence of these supposed traders in a locked facility to register in their bleary minds as a problem. Destiny fire blasts the wine barrel, which pretty much explodes under the pressure, killing one guard immediately and knocking out several others; the remainder are easily despatched. The players free the bound man first, and he helps them to keep the rest of the slaves calm and relatively quiet; he tells the PCs that he is a monk of Lawful affiliation, and offers to lead the freed slaves to safety in groups to the south of the complex. He and the adventurers then take the slaves out in small groups through to the safe areas that belonged to Markessa, joining up with the folks they freed earlier. The fortress still has not been alerted to their presence, because the two doors leading into the cells are very substantially reinforced pieces of prison equipment, so the sounds of death at the end of the cell complex have not travelled enough to alert anyone. Even so, there is a tense moment as another patrol emerges from the area of the barracks, but again the players manage to bluff them; this time they pretend that they are delivering slaves for processing. These soldiers have just got out of bed and are on their way to the mess hall for breakfast before getting ready to take up the dawn watch on the walls.
Once this is all done, the band of three investigates the large cell with the statue in it. According to the woman they freed earlier, Markessa's sorcerously altered double, there is some sort of cave warren beyond there. She says that this cell is where the insane, mutated remnants of her experiments are dumped, and that it is very likely not safe to go any further. The characters do spot a misshapen thing, possibly a former human, lurking in a crevice concealed in the wall behind the statue, but it skitters off into the darkness beyond. They decide not to follow it.
The trio of friends then resume their methodical progress. Room 27 is a set of latrines, and they decide to avoid the barracks. However, the central corridor leading into another part of the complex turns out to have active inhabitants (marked 25 on the map). Two guards are surprised and swiftly executed, with Destiny's air elemental buffering the sounds. The characters now find themselves in a corridor with three doors on either side - possibly a set of officers' quarters?
They start with the room that is first to their left (25a on the map). Here they surprise a man sitting at a desk, working on a set of plans by lamplight. He jumps up, trying to hide whatever he was doing, and then starts at the appearance of the PCs - "You're not slavers!" He makes no threatening moves, and indeed offers to help them. "My name is Carlstar, and I was captured some months ago by these slavers. However, I have been allowed relative freedom because of my engineering and mining skills - the slavers always make good use of those of us with skills." He has been secretly making his own map of a possible way out towards the south of the slavers' citadel, and the characters confirm his suspicions, since that is how they entered the place in the first instance. Carlstar fills them in on the other inhabitants of this little part of the basement level. Room 'b' contains an alchemist, another former slave who has been forced to work with the slavers, in his case the strange looking elf woman; he too could be persuaded to join in against their overlords. Room 'c' quarters two guard captains - "You'll probably need to take them out quickly, if you can." [This one is incorrectly labelled 'b' just next door to Carlstar's room.] Room 'd' houses the slavers' accountant and scribe - a little weasel of a man who simply cannot be trusted; he actually works for the slavers, and they pay him handsomely too. Room 'e' houses three warriors who have been altered into some sort of berserk lycanthropes by Markessa's magic; Carlstar reckons they will be delighted to turn the tables on their masters. The room marked 'f', however, will be very dangerous; these are the quarters of that weird guy Blackthorn - another of the slave lords about whom the characters have been warned.
First order of business is to get the alchemist on their side, which Carlstar does by the simple expedient of knocking on the guy's door and dragging him out of bed. "Hush!" he says, "This is important. I've come across something you should know in my calculations." He brings the alchemist into his own quarters, and the players greet him. He introduces himself as Fyndax, and says that since he was forced by Markessa to help make the brew that turned the three warriors (in room 'e') into werewolf things, he can make an antidote for them quite quickly - in fact he has the reagents in his room; he just needs a few minutes to mix them. While he does that, the characters knock out the accountant, grabbing his notes and papers for later perusal. The group then makes friends with the altered warriors, and Fyndax gives them the antidote. [One of them made a critical save, and retains the speed, strength and constitution of a werewolf even though he is returned to what looks like normal form.] While in their quarters, Marion notices a well-concealed secret door of which the three men were themselves unaware. The plans now for those three to take out the guard captains, a task they look forward to with relish, while the players follow the secret passageway, which turns in the direction of Blackthorn's quarters. Hopefully this will clean out this entire area of the fortress' basement.
As they move warily and silently through the narrow passage, the group spots a really small square niche in the wall directly ahead of them, just as the corridor turns directly towards Blackthorn's room. They can just about make out a borehole of some sort that leads to a hidden, but rather inaccessible chamber carved into he rock. They note this for later exploration, and then get ready to ambush the slave lord Blackthorn from his own secret passage.
He turns out to be wide awake, and working at his desk. He turns invisible and then levitates up to the ceiling above his desk, a trick that would work on a normal group, but not this lot with their witch sight and so on. Marion puts a couple of throwing knives into him, so he turns into a stream of smoke that heads off into the corridor from which the players have just emerged. Sir Blanque reacts swiftly and grabs an empty waterskin from his belt. Unstoppering it in a single fluid motion, he uses it to gather the smoke [DEX 22 is really useful!]. the skin bulges and shatters as Blackthorn coalesces, and then Destiny's slices open the creature's leg. Blackthorn surrenders, realising he is outmatched. Destiny reckons he is some sort of creature from another plane; those are some rather unusual abilities.
Their opponent grins at them when he hears this. "That's right!" he says, bowing politely, albeit with a mischievous glint in his eye. "On my home world, I am known as a Dai-Oni - a goblin spirit lord, if you will. Stalman Klim summoned me to this place to act as his lieutenant here, and also to keep an eye on that woman Markessa - she is something called a Dharzi, or whatever. Anyway, although my kind can be bound to service, I am here as part of a bargain, and technically you have broken that because I have so helpfully surrendered. I specialise in betrayal, and I would be delighted to help you destroy this ring of slave lords. In order to seal our compact, I will even tell your rather powerful sorceress here my true name; you will then be able to summon me if you so wish. I would rather this than death at your hands."
Umpire's Notes
The players proceeded with their usual skill and caution, and this paid off very handsomely indeed. The reference to the Dai-Oni pleased Beth in particular - she's a big Anime fan. In the original module, he is an ogre mage. The upshot of his deal with the players will be very important, but more on that another time.

Comments
Post a Comment